
How to connect your coding agent to WTFM
Updated about 2 months ago
Browse All
WTFM writes your documentation through the coding agent you already use — Claude Code, Codex, or both. Connect it once during setup, and your agent can start writing illustrated articles for you.
Before you start
- Claude Code, Codex, or both installed and signed in
- Git available in your terminal
-
The
wtfmcommand installed — runcurl -fsSL https://wtfm.sh/install | bashif it isn't yet
Steps
Run setup
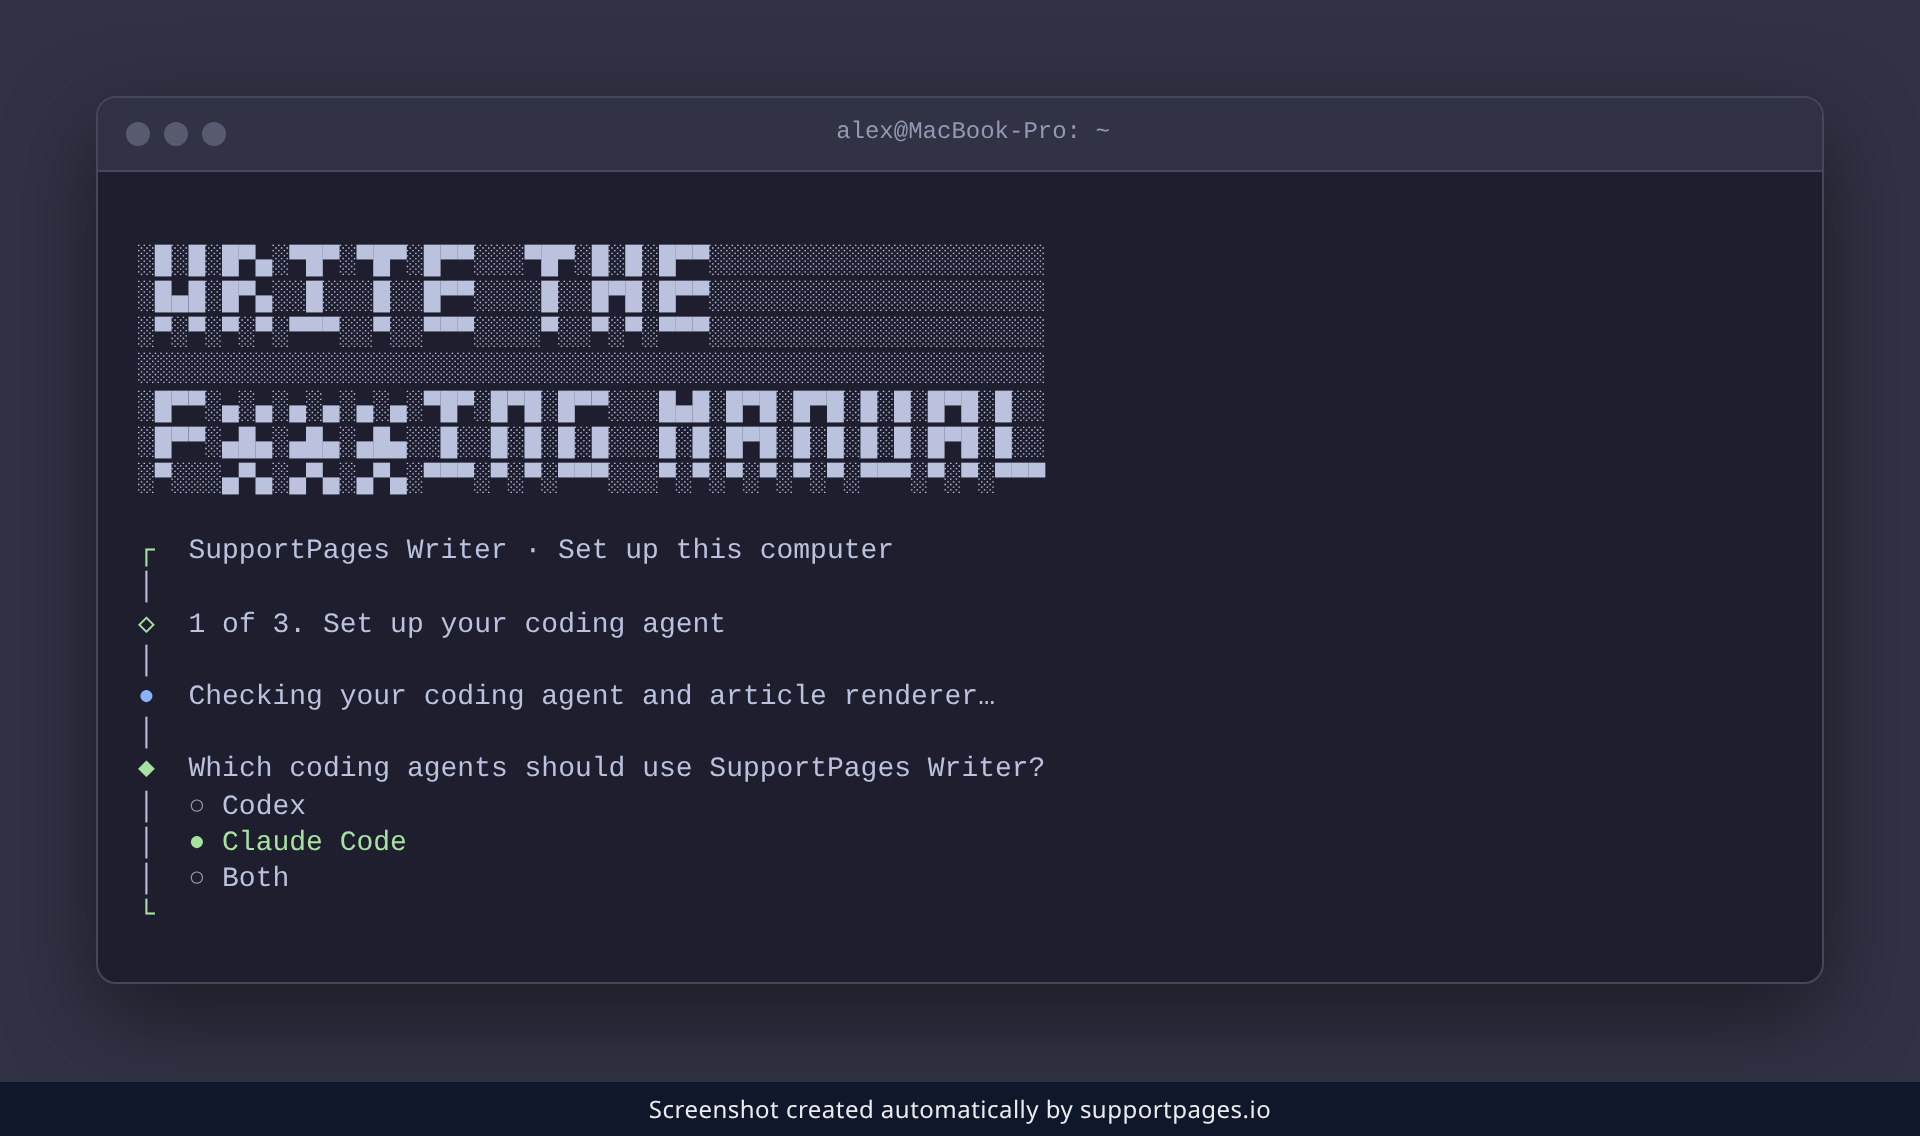
Open your terminal and run the setup command. It checks that your coding agent and the article renderer are ready, then asks who should write for you.
wtfm setup
Pick your coding agent
Setup asks Which coding agents should use SupportPages Writer?. Use the arrow keys to move, then choose Claude Code, Codex, or Both and press Enter.
Check that your agent is connected
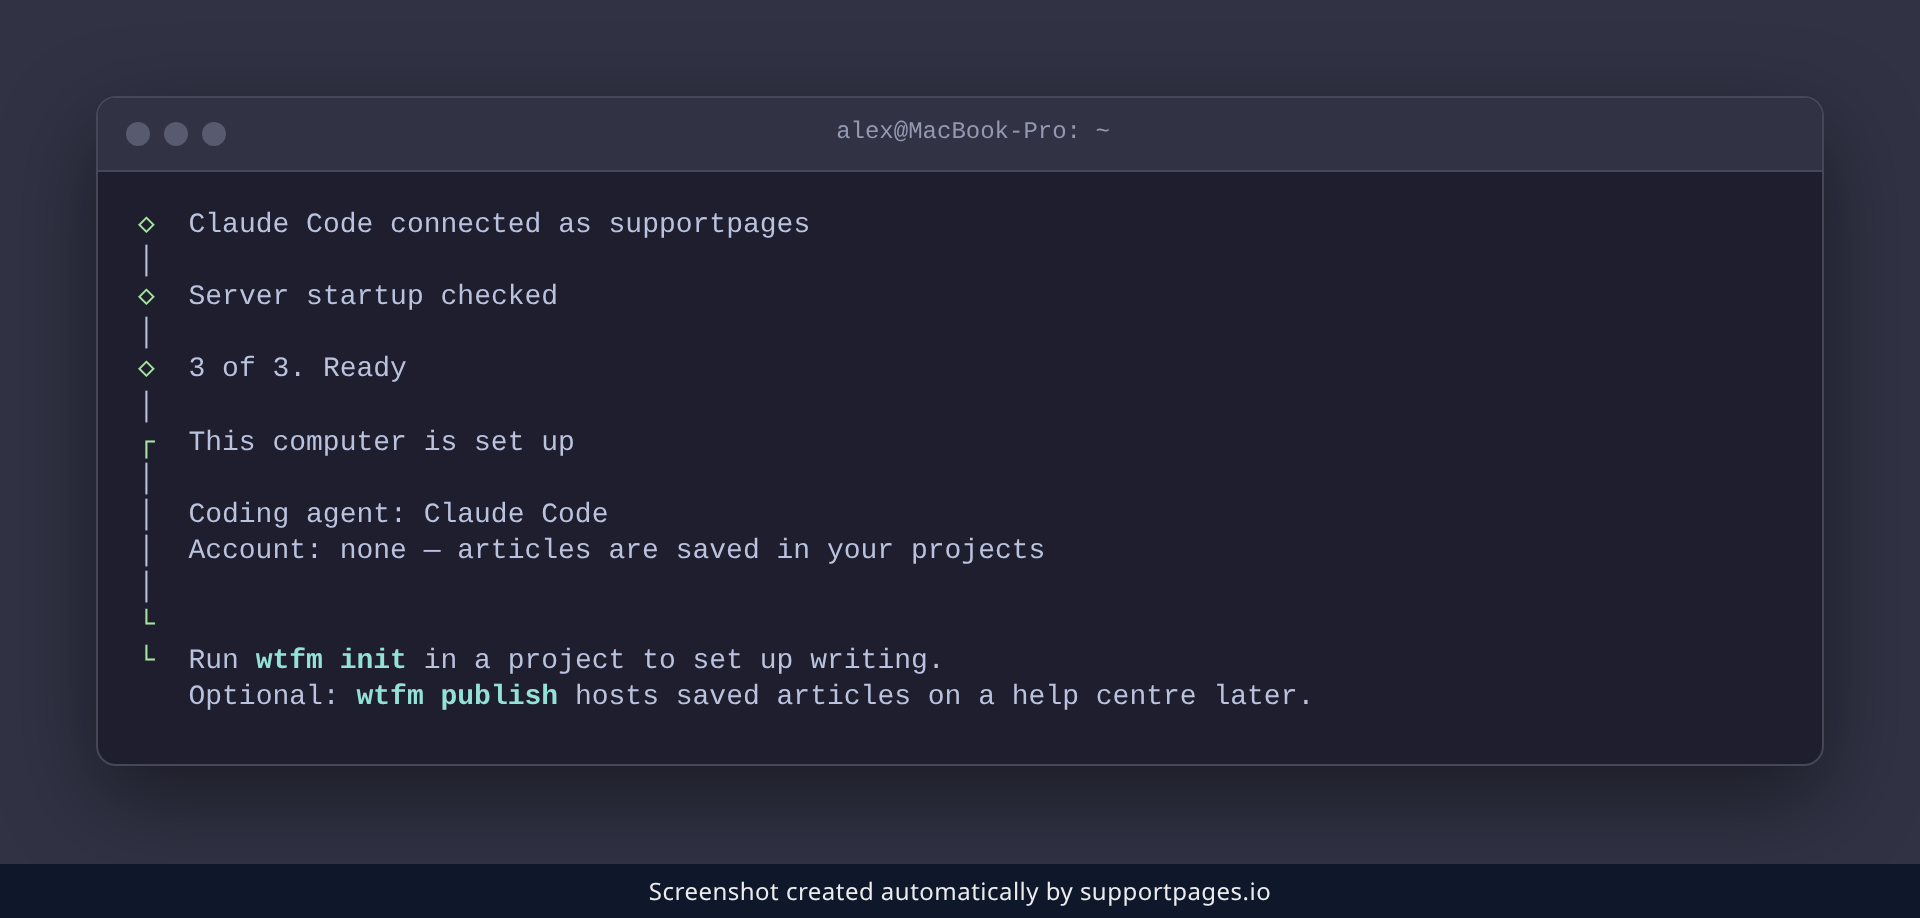
Setup registers the agent, downloads the screenshot browser the first time, and finishes with This computer is set up. Your choice is listed under Coding agent, and any Claude Code or Codex session that was already open needs a restart to pick it up.
Tips
- Choosing Both connects Claude Code and Codex together, so you can decide per project which one writes.
-
Setup connects your agent on this computer. To change which agent a single project uses, run
wtfm configureinside that project. -
Run
wtfm setupagain any time — your choice is kept and only what's missing gets filled in.
Summary
Your coding agent is now connected to WTFM. Open Claude Code or Codex in a project, run wtfm init to set that project up, and ask it for your first article.
Was this article helpful?
Built with supportpages.io — SaaS documentation software.
Have a question?
Search our articles, or ask and get an answer straight away.