
How to sign in to SupportPages.io
Updated about 2 months ago
Browse All
Signing in links this computer to your SupportPages.io account, so SupportPages Writer can publish the articles it writes to your help centre for you. It takes one browser approval, and then this computer stays signed in.
Before you start
-
SupportPages Writer installed on this computer. If you have not set it up yet, run
wtfm setuponce. - A SupportPages.io account. You can create one during sign-in if you do not have one yet.
- A terminal to type in, and a browser on the same computer.
Steps
Start the sign-in
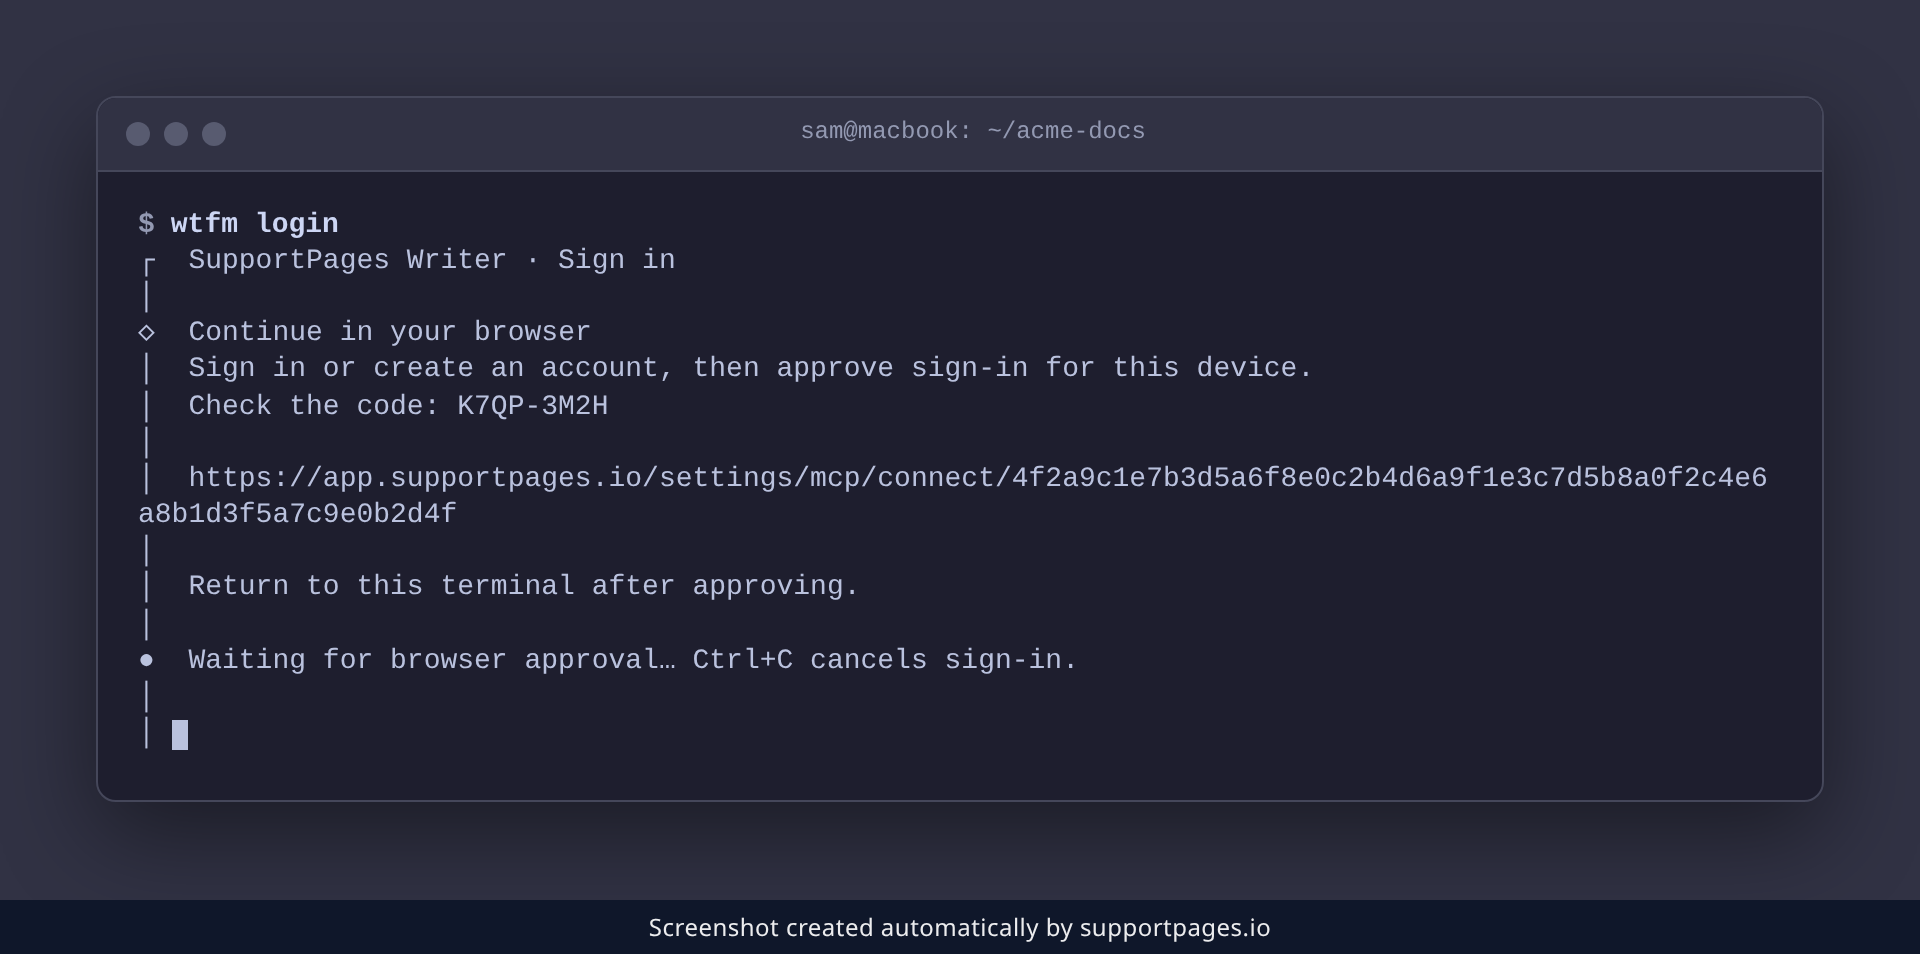
In your terminal, run the sign-in command.
wtfm login
It prints a short device code and a link, then waits while you approve it in your browser.
Approve it in your browser
Open the link it printed, or copy it into your browser. Sign in to SupportPages.io, or create an account, then approve the request for this device. If you want SupportPages Writer to publish to a help centre, allow the hosting permissions for publishing, managing and generating on the same page.
Check that you are signed in
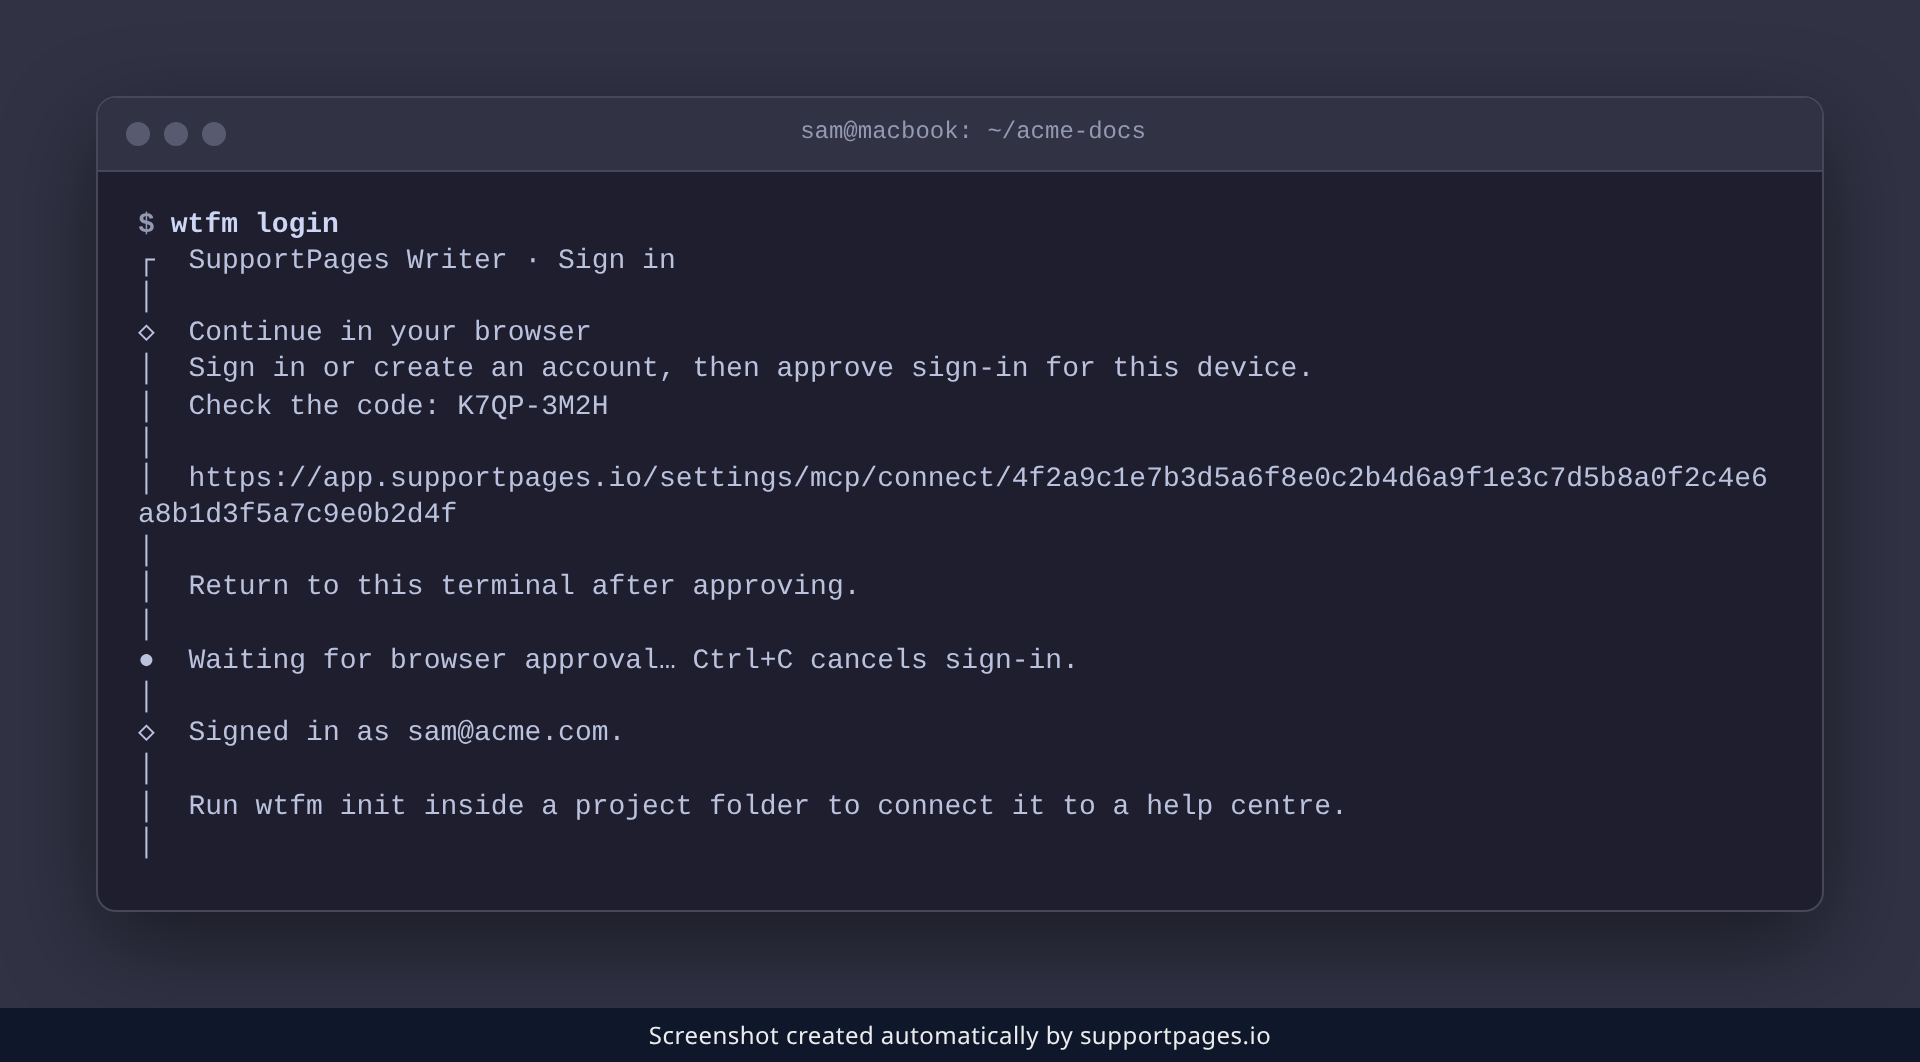
Return to your terminal. The command finishes on its own once you approve, and prints Signed in as followed by your account email, which means this computer is linked and ready.
Tips
-
Want to switch accounts? Run
wtfm logout, thenwtfm loginagain. -
Signed in before but missing a permission for hosting? Run
wtfm loginagain with the--scopesflag to ask for publishing, managing and generating. -
Check who is connected at any time with
wtfm status.
Summary
One browser approval is all it takes, and this computer is now signed in to SupportPages.io. Next, run wtfm init inside a project folder to connect it to a help centre.
Was this article helpful?
Generated by supportpages.io, automating product documentation from your codebase.
Have a question?
Search our articles, or ask and get an answer straight away.